White & clear PU
Choose the material for the garment
White PU
Suitable for light, coloured and dark garments.
130°C3-second press
Clear PU
Suitable for white and light-coloured garments. Artwork is printed in reverse so the printed image sits between the PU and the garment when pressed.
150°C15-second press
Transfers are applied using our xTool WonderPress dual-station heat press.
Want to try it yourself?
Book a free hands-on xTool WonderPress demo at Print Me Makerspace in Bell Green, Lewisham. See how a heat press is used to apply garment transfers and experience the process yourself.
BOOK A FREE xTOOL WONDERPRESS DEMOHow it works
From printed artwork to a garment transfer
The video demonstrates the full Print & Cut and heat-application process. The same steps are written below so you can follow what is happening at every stage.
Print & Cut
The artwork is sent to the Roland as a Print & Cut job.
Weed
The unwanted PU surrounding the design is removed.
Apply application tape
High-tack application tape is applied over the printed design using a squeegee.
Remove the backing
The backing is peeled away, leaving the printed PU held in position by the application tape.
Pre-press
The garment is pre-pressed for 5 seconds.
Position
The transfer is positioned on the garment and covered with a silicone sheet.
Heat press
The material and process shown in this demonstration use 130°C for 5 seconds. These are not universal settings for every printable PU.
Peel
Wait a few seconds and peel warm.
Preparing the production file
How does the printer know where to cut?
The printer does not decide the cut shape itself. We create a vector or SVG outline in the artwork and designate it as the cut contour. When the job is sent to the Roland using Print & Cut, the machine prints the artwork and then follows that vector contour to cut the required shape.
Artwork
What gets printed
Vector / SVG contour
Where the machine cuts
Creating the cut contour is therefore part of preparing artwork for Print & Cut production.
Creative control
The cut can be part of the design
Print & Cut does not mean every letter, photograph or individual element has to be intricately cut around. The cut shape is a creative choice.
Close / intricate contour cut
The vector cut line follows the artwork closely, creating a detailed edge around the design.
Block or designed shape
A larger area of printable PU is deliberately retained so its shape becomes part of the finished design.
Real project
Emmanuel Cezzanne exhibition T-shirt
The back artwork contains exhibition information and the participating artists' names. Its blue shield-shaped SVG outline was not intended to be printed: it was created as the cut-contour path that tells the Roland where to cut.
For this project, we deliberately used white printable PU on a white T-shirt. Instead of individually cutting around every name and piece of typography, the artwork stayed together inside one shield-shaped piece of white PU.
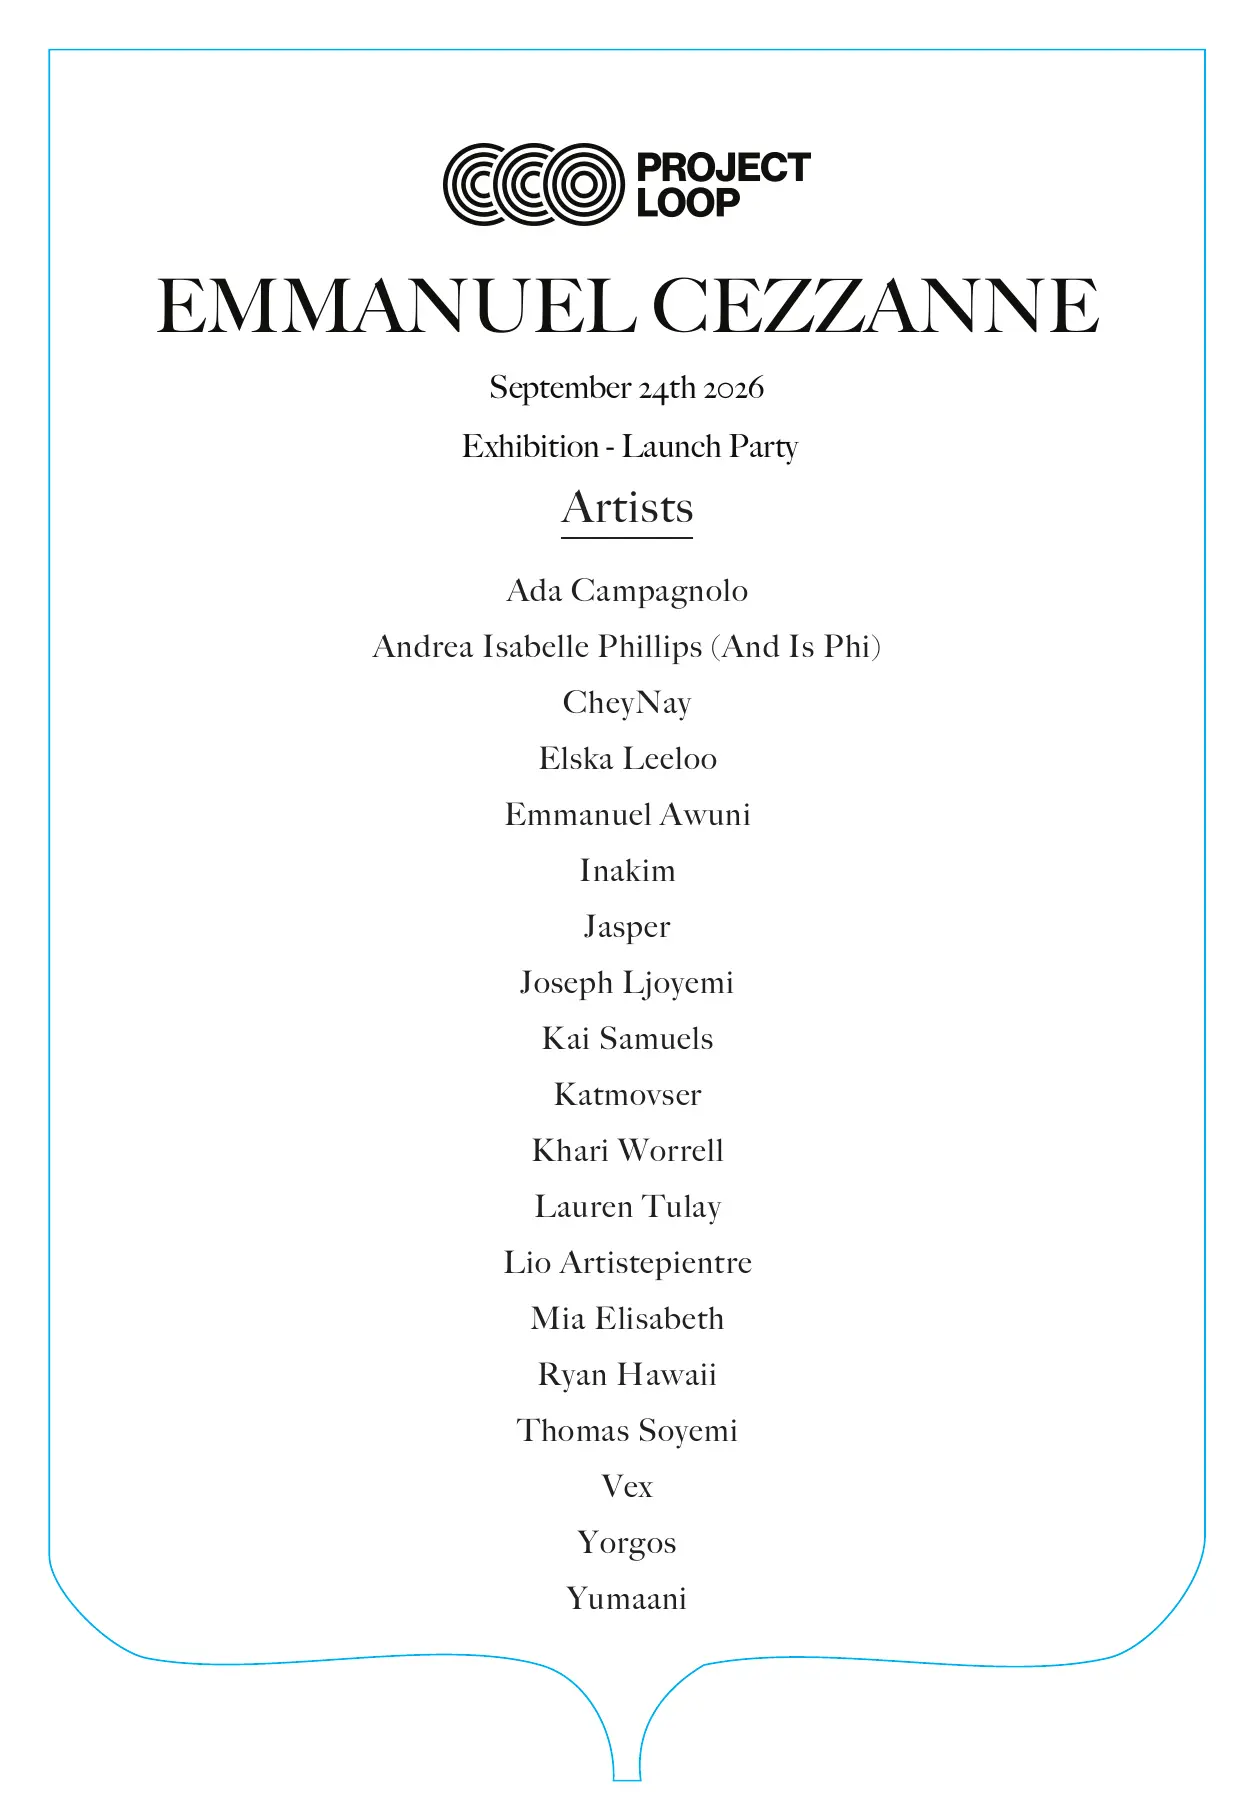

The material and the cut shape can both become part of the design.
Artist: Emmanuel Cezzanne — Creative Design Adventurist
Artwork preparation & touch-up: Sabrina Lindridge — Graphic Designer & Concept Artist
Website: emmanuelcezzanne.co.uk
Instagram: Emmanuel Cezzanne
From file to finished garment
Learn what happens at every stage
You do not need to arrive already understanding Print & Cut, contour paths, weeding or heat pressing. At Print Me Makerspace, we can help you understand how artwork becomes a production file, how a vector cut contour is created, how the Roland interprets Print & Cut information, how the material is weeded and transferred, and how the finished design is heat pressed.
Art File Prep
Clean edges for accurate contour cutting
For best results, supply artwork as a CMYK PNG at 150–300 dpi at the actual size you want it printed. The closer the artwork is to 300 dpi at its final print size, the better the print quality and fine-detail reproduction will generally be. For our workflow, the prepared artwork is then saved as a PDF for final printing.
Artwork intended for contour cutting should have clean, clearly defined edges so an accurate cut path can be created around the design.
Our Makerspace Heuristic
Open areas help the transfer stay flatter
PU has a tendency to curl when artwork is printed heavily or right to the edge. This can increase the time needed to position the transfer accurately before pressing. We have found that the more unprinted white or clear PU left within and around the design, the flatter and easier the transfer tends to be to handle.
This makes the artwork itself part of the production decision. A heavily printed, edge-to-edge design may take longer to prepare and position than a design containing more open or unprinted areas.
Complex designs & weeding
Keeping separate elements together
More complex contour-cut designs may require weeding, where unwanted PU is carefully removed after cutting. When a design contains multiple separate elements, transfer tape is applied over the weeded design. This holds the individual pieces together so the complete design can be lifted from its backing, positioned accurately and transferred onto the garment as one piece.
Once transfer tape has been applied, additional taping down is not normally required. More intricate artwork may therefore require additional time for weeding and transfer-tape application.
PU is our Tier Two training level, progressing from applying a ready-made transfer to learning how to prepare, print, contour cut and press your own designs.
Workflow
From artwork to finished garment
- Artwork
- CMYK eco-solvent print
- Contour cut
- Weed
- Transfer tape
- Position
- Heat press
- Finished garment